How to Make a Smooth & Perfect Challah Dough
Beyond the Recipe
For many people following a recipe to make good challahs isn’t enough. They need to know how to have that “feel” that really makes a dough from something hard or lumpy into something smooth, elastic and wonderful to work with, something amazing to bake.
A Virtual Challah Baking Session
In the absence of a personal challah baking session with me personally standing near you helping you perfect your dough, follow along the tips I’m going to outline here.
Download a copy of my Incredible Challah Dough recipe card that is free when you sign up for Challah Bytes emails from me. Print out the recipe so you have it handy.
Your first time making challah?? Too scared to make a lot? Not ready yet to make enough for hafrashas challah with a bracha and just want to ‘try it out’ first before doing a large batch? Get the recipe for “just one or two loaves of challah” right here instead.
Now let’s get started!
1. Put the oil, sugar, hot water and then room temperature water together into your mixing bowl.
2. Sprinkle in the dry yeast (2 tablespoons of dry yeast or a bit more, 2 tablespoons plus another teaspoon if you are using whole wheat).
Your yeast must be dry yeast that was either opened that day or that was kept in the freezer since the first day it was opened so that it retained its full strength. If you do not have a package/ packet of dry yeast that is NEW or kept properly in the freezer – STOP. Go out and get some and only then continue. Yeast that works is the most important ingredient!
Here is an article with more yeast information.
3. Now add only half the amount of flour called for in my recipe.
4. Then add in the salt and the eggs.
5. Begin to mix, either by hand with a heavy spoon or spatula, or by turning on your mixer.
You should soon have a very wet and mushy dough mix. It wont look like a dough yet – this is FINE.
6. Mix for 3-4 minutes.
7. Get some more warm water and leave it near your working area so you have it on hand in case you need it.
8. While the mixer is working, or you are working, begin to add in the rest of the flour several cups at a time.
You should begin to see the dough get suddenly quite floury and also become a bit harder to mix.
9. Turn down the speed if you are using a mixer. Keep on kneading.
Now comes the important part. If you’ve added all the flour by now but your dough seems TOO HARD, do this:
10. Add in about 1/4 cup more water. The dough will get mushy and then begin to soften.
11. Knead further, and if it still seems kind of tough to you, add drops more water.
TIP: You may need to sprinkle on a small amount of flour to the outside of the dough to keep your mixer working well also. If you have to, turn the mixer off and use your hands to work the dough a bit.
By now the dough should have softened considerably. Total kneading time should not exceed 10-12 minutes.
Activating the Gluten
When putting your dough together, some of the most important steps involve what I mentioned earlier, ‘activating the gluten’ in the flour. To do this, you must knead the dough for enough time, 10-12 minutes.
I suggest kneading the dough twice. During the first round of kneading I set a timer (my mixer has a timer on the mixer itself) for 10 or 12 minutes and I knead the dough exactly that amount of time. Then I turn off the mixer, or if doing it by hand, I stop kneading and let the dough rest.
12. Finish off the first kneading by adding another 1-2 tablespoons of oil to the top of your dough. Even if the dough does not (yet!) look perfect – stop.
13. Cover the dough with plastic and let it rest.
How does challah dough “rest”?
My method is to cover the dough loosely with plastic. This keeps the dough from drying out. A “rest” means leaving it alone, covered for 10-15 minutes. By this time the dough should have begun to rise somewhat and it is now ready for you to go on to the next step.
After this ‘rest period’ I then knead the dough once more for an additional four minutes. That’s all.
This second kneading after the rising period activates the gluten. You can even see it in the dough itself because it should be, by now, elastic, smooth and nice to the touch. Whatever imperfections you saw in the dough previously will now smooth itself out.
TIPS:
If your dough is STILL too hard:
This can happen if you used too much flour by accident or if you are using whole wheat flour that has a higher bran content. Make a hole in the center of your dough by pulling it open with your hands. Pour some very warm water and a teaspoon of oil into the hole. Close it up as best as you can and let the dough rest, covered, for the ten minutes this way.
If your dough is too WET:
During the second knead, if your dough is really too sticky still or quite wet and overly loose, add in another half cup of flour while it’s kneading; you may even need more flour if you really overdid it on the water earlier on. Once it looks like a smooth and elastic dough, STOP adding flour; too much flour will dry out the dough! Add a bit more OIL instead and your dough will be great!
After the ten minutes, turn the mixer back on or knead by hand. Keep mixing for about 3-4 minutes and you should see your dough begin to soften and come smooth and nice to the touch.
Now your dough is done!
You should have a great dough that does NOT stick to the sides of the bowl and that is smooth and easy to work with.
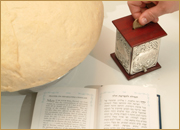
Hafrashas Challah
If you made the full amount of dough listed in my Incredible Challah Dough card, you can now do the tremendous, holy mitzvah of ‘hafrashas challah’ with a blessing.
See here for a step by step guide to hafrashas challah, including the blessings and prayers to say at that time.
Rising After Kneading
Remove the dough from the mixing bowl and place it in a large strong bag (a fresh and large garbage-sized bag is great for this) to finish rising, about another 1.5 hours.
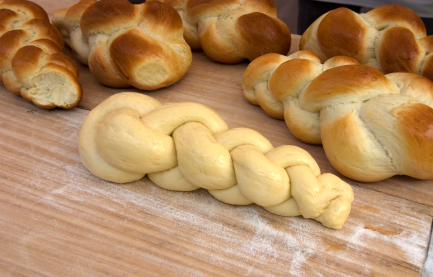
And THEN you will be ready to shape your challahs!
Try these tips. It is sure to enhance your challah dough and thereby also enhance the beauty of your finished challahs.