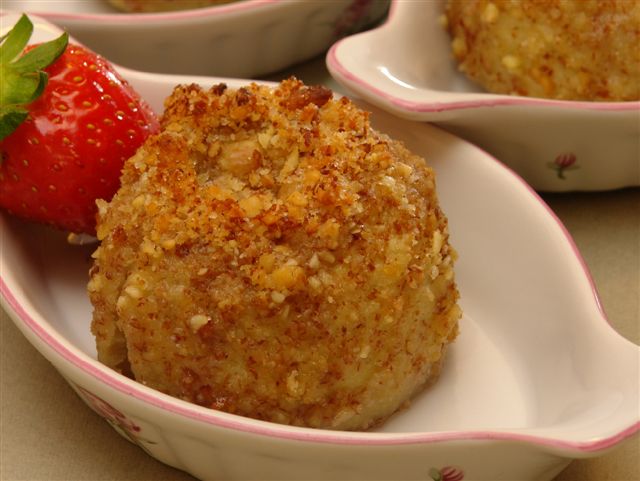
Expert challah tips and tricks. Join Challah Bytes today!

Tag Archives: healthy

Crunchy Coated Baked Apples

50_crunchy_apple
image-2001

Yield: Each apple is one serving, but most people will want more than one serving of this one!

Ingredients

6–8 medium green apples, peeled
Oil as needed
1½ cup crushed walnuts or almonds, or a mix of both
¼ cup sugar
1 packet vanilla sugar
White raisins, optional

Method

Peel and core each apple.

Preheat the oven to 350°F / 180°C.

In a bowl, mix together the crushed nuts, sugar, and vanilla sugar.

Brush each apple gently with a bit of oil. Roll each apple into the nut mixture.

Line a small baking pan with parchment baking paper. Stand up the coated apples in the pan. When they are all ready, spoon a bit of the nut mixture into the center of each apple’s hole. You may choose to add several golden raisins to each apple’s center as well. Place the pan into the oven and bake for about 45–55 minutes, checking them after the first 45 minutes. They are done when they are soft.

Pumpkin Lentil Soup

Serves: 8-10
Large 12-14 quart pot with lid

Ingredients

1-2 Tbls olive oil
2 onions, finely diced
2 medium zucchinis, unpeeled, washed well, and chunked
1 lb (½ kilo) fresh pumpkin (only! It won’t work with canned), peeled and cubed
1 large white potato, cubed
1 cup dried red lentils (they appear orange in the bag)
2-3 scallions, diced
1 Tbls salt
1/3 tsp pepper
¼ tsp dried mustard powder
8 cups water

Method

Sautee the diced onion in the olive oil until clear; add the chunked zucchini on top of it and continue to sautee for 2 more minutes.

Add all the water, and while it is coming to a boil, add in all the rest of the ingredients. If you do not have mustard powder, you can use one heaping tablespoon of regular mustard in its place; it won’t be exactly the same but will still be quite good. After the soup has started boiling, turn down the flame and simmer for 2 & ½ hours. Freezes well, just make sure to reheat completely before serving.

Blended Fruit Soup

A delightful summertime treat that I specifically save it for seudas shelishis (the third meal of Shabbos afternoon)

serves 8 to 10

My neighbor Esther shared this with me. It is a variation on an otherwise typical fruit soup, and it is such a delightful summertime treat that I specifically save it for seudas shelishis/ the third meal of Shabbos afternoon. It also is such a refreshing treat in the Succah. Here in Israel, Succos is still very warm in the daytime, unlike most of the East Coast of the US of A! My kids love it; they don’t see or taste any pieces and the color is very attractive. For those who DO like texture in a fruit soup, you can just puree it half way.

Ingredients

each of assorted overripe fruits, such as seedless grapes, plums, peaches,
nectarines, and apricots, or even a glass jar of red cherries
1/4 – 1/2 cup sugar (optional)
1 cup orange juice
2 tablespoons agave syrup (a natural chemical-free sweetener available in health-food stores)
** You can use 2-4 tablespoons of apple juice concentrate instead if you don’t have access to the agave syrup

Method

Wash all fruit. Slice and dice (if you are not pureeing all the way, be sure to cut each grape in half to prevent small children from choking G-d forbid) and place all fruit in a large pot. Fill the pot with water halfway up to the height of the fruit.

When the water boils, turn down the heat and simmer until fruit is completely cooked, about 40 minutes. Cool and add orange juice and agave syrup. Taste the liquid. If it is too tart for your taste, add sugar (but I never need to). (Or more agave if you want to keep the sugar out completely.)

Puree the fruit soup with a stick blender and chill thoroughly in a glass or plastic container, covered. Serve in small dessert bowls or pretty glasses and watch your family enjoy it to the last drop!

Soft Fruit- What to Do with It All?

This is part 2 of a two-part series. Find part 1 here.

I bought such beautiful fruits, but a good portion of them became too soft to enjoy before we could finish eating them. I am loathe to throw them out; however, there is not enough for me to make a fruit soup out of them. Any ideas about what else I can do with it all?

Another idea I find works very well for soft puréed fruit is to simply make healthful muffins out of them. Here’s a muffin
ratio I use all the time, and whatever choice of fruits I use to bake these with, they’re always appreciated:

Fruity Whole-Wheat Muffins

Ingredients

3 eggs
1 ½ cups light brown sugar
3 cups light whole-wheat flour
1 cup oil
1 ½ teaspoons baking powder
1 ½ teaspoons baking soda
¾ cup orange juice
1 teaspoon vanilla
2 cups puréed fruit

Method

Beat the eggs in your mixer, no need to separate them. Add in everything else in the order listed, except the fruit. You should have a nice thick batter that is still pourable.

Pour in the puréed fruit and swirl it in by hand with a spatula. Line a muffin tray with paper muffin cups, and fill each one with batter until nearly the top. If you like, you can sprinkle some cinnamon and sugar on top of each one. Bake for 18–20 minutes until they test done. Remove from the oven immediately. These freeze well, and they make a very nice, easy lunch, together with some fresh vegetables and cottage cheese.

The muffins also make a great, nutritious lunchbox treat, just in time for the back-to-school season!

Soft Fruit- What to Do with It All?

This is part 1 of a two-part series. Find part 2 here.

I bought such beautiful fruits, but a good portion of them became too soft to enjoy before we could finish eating them. I am loathe to throw them out; however, there is not enough for me to make a fruit soup out of them. Any ideas about what else I can do with it all?

Yes, it can be rather upsetting to see our produce go to waste.

Here are some ideas for your soft fruits:
Wash the fruits and take out any pits. Purée them in your food processor or blender. Using a measuring cup with a spout, pour the puréed fruit into ice cube trays. Freeze until solid.

Now you have several options for using this fruit:

1. These make perfect “ice cubes” for cold fruit shakes or cold fruit drinks. When they defrost, they won’t make your shake
watery the way ordinary melted ice cubes do.

2. These cubes make great non-dairy fruit shakes. Put four them at a time into your blender, together with 2 cups of any
fruit juice of your choice, then blend. To make the shake thicker, add one frozen banana, cut into chunks, before blending.

3. Your family can enjoy the frozen fruit cubes as they are; they make a refreshing (and healthful!) treat in hot weather.
However, if you are going to use them as ice pops, I suggest tasting before you freeze them. Sometimes the fruit can become
rather tart when blended. If so, add date syrup (or sugar) according to taste and then freeze. You can put a toothpick into
each cube for easier handling when you want to remove them later on. Or splurge on popsticks, found in all craft stores.

4. You can make fro-yo ice pops out of them. Add some honey and then mix with plain, non-sugary white yogurt. Taste to
ensure the mixture is sweet enough, and then freeze in ice pop containers. These make a great and healthful frozen snack
during the hot summer months.

Mandarin Orange Beet Salad

Beets keep well for longer periods of time, are full of healthy vitamins, and have so many varied uses. Instead of just average borscht or chrein, why not try something new this year?

47_beet_and_manorange
image-1518

Tip

You can freeze cooked beets and when they are defrosted, they are just as good as the day they were cooked. This is a GREAT time saver. I buy a lot of beets at one time, and then peel, check and boil them all on the same day. After they are cooled, since they shred and/or chop nicest when they are cold, I cut/shred/slice them into whatever form I want to store away. Then I pack them into disposable plastic containers, label what they will be for, and freeze them. This saves tons of time during the holiday, and also saves me some valuable fridge space. Plus, I do not have to worry about the beets going bad in the fridge, nor wilting or going moldy in storage before they are even cooked.

I really enjoy this particular salad, and surprisingly, so do my kids. If you need to cut down on sugar intake, you can cut the sugar here to 2 Tablespoons and still maintain its flavor from just the fruits in the salad. The taste is outstanding, and the presentation is so pretty with the vivid splash of colors against each other…

Mandarin Orange Beet Salad

This ratio makes enough for 4 people

Ingredients

2- 2 1/2 cups cooked and shredded beets, which is about 3 medium sized beets
1/4 cup sugar
1/4 tsp. salt
1 tsp. fresh lemon juice or vinegar
1/4 cup juice from what the beets were cooked in; (or just use the mandarin orange juice below, if you threw out the beet juices by accident)
1/4 cup almond slices
6 dried apricots, diced
1/3 cup white raisins, optional
1 can mandarin orange pieces, juice included
1/4 -1/2 cup pine nuts for garnishing, optional (this depends if you can find it in your area with a Pesachdik hechsher)

Method

Mix together the beets, sugar, salt, and juice and water. Refrigerate until serving. Right before serving, add in almond slices, diced apricots, and white raisins, tossing just a bit. Decorate with the mandarin orange slices arranged nicely on top, along with the pine nuts and serve.

Margarine or Oil? Which will it be?

It’s been years since I’ve switched over nearly all my baking from margarine based recipes to those that use oil instead. Margarine is an unhealthy food, (and some can argue that it may not even be called food!), and because of the increased health awareness today, bakers everywhere want to know what to do when recipes call for crumbs or bases that require margarine.

I have this great apple/fruit crunch that we enjoy eating every Shabbos day and it calls for lots of crunch on top. The main ingredient is margarine and I want to create that “crunchy” crunch but without all the trans fat of margarine. How can I do this?

Note: yes there are margarines sold that are ‘trans-fat free’; these ideas are for those who can’t get this or who prefer to use oil instead.

The short answer to converting recipes from margarine to oil is that in general, one uses the same amounts of oil as they would margarine. For instance, when I do a crumb mixture, I begin with the same ratio but if the crumbs look too ‘dry’ I will add a bit more oil until I like the texture. Other times, I will decrease. For example, a relative of mine has this really amazing recipe for ruggelach dough and has been making them for every family simcha for over 35 years. However, it has 2 entire cups of margarine for only 7 cups of flour! No wonder they are so light and crispy! When I learned that, I stopped letting my relative give us bags and bags of those heavenly baked items for my kids. But when I went to duplicate the recipe myself with oil, 2 cups just made it swim around and I had to play with the recipe until I had a dough that I liked. True, it is not quite as crispy and flaky as the margarine dough, but it is very good and there is no trans fat involved at all.

Back to the crumbs question, you can add lots of good-for-you grains and nuts to your crumbs so that besides being margarine free, it can also be white-flour and white sugar-free. You can also cut down on the amount of sugar used until you reach the taste you like, thereby decreasing the sugar content as well. Since you are sprinkling the crumbs on top of sweet fruit, you don’t actually need all the sugar most recipes claim you do in order to have a good tasting crumble on top of your apples (or peaches, cranberry, pears, etc.)

Here’s a basic ratio that we enjoy using on our fruit crumbles. It also freezes well and if you have any leftover, you can always put it back in the fridge or freezer to use for the next time.

Ratio for one 8×11 inch pan (or you can split it between 2-3 loaf pans of any size you like):
1 cup whole wheat flour
1 & 1/2 cups oatmeal
2 teaspoons cinnamon
1 – 1 & 1/2 cup ground nuts such as almonds or walnuts
Optional: 1/4 cup sunflower seeds (unsalted), or whole sesame seeds
1/2 cup – 3/4 cup demerara sugar (light brown)
3/4 cup oil of choice (not soy oil)

Directions:

Put all the dry ingredients into a large bowl and mix them together with a fork. Add in 1/2 cup of the oil and continue to toss the mix together with your fork. If it is still too dry, add in more of the oil. It should resemble a nice, darkened crumb mixture that is neither too wet nor too dry. If it does become too heavy, add more oats or flour or nuts to it and remix. This ‘recipe’ does not need a mixer.
Just sprinkle this generously over the sliced fruit in your pan, bake it at 350°F / 180-190°C until the top is lightly browned and crispy and it’s ready. You can certainly freeze this. To serve, just defrost and serve. We enjoy it best cold, served directly to the table alongside the cholent or chicken meal.

Another fun idea that you can try with this recipe is to turn into a sort of granola. Try packing it alone into a baking pan and baking it – see if it will let you cut it into small bars afterwards. You may need to add more oil for this to work, though. Or you can spread it out on a lined cookie sheet and bake it until it’s toasted, and then try adding it to your plain bio yogurts or ice cream or with some milk and bananas…

The ideas are endless and are all up to your creativity!

Enjoy taking the margarine out of your diet.

Healthy and Refreshing Milkshakes

It’s that time of year again when it gets very hot outside and everyone constantly wants something refreshing to sip on. Buying milkshakes or ice coffee in the stores can be very pricey, especially if you are treating a large crowd of your children or grandchildren. Besides, the amount of sugar added in many cases really racks up the calories. Here’s another question I get from readers:

I want to make some kind of milkshakes for my kids but haven’t figured out how to make them that great consistency like the store does. Is there another way to do this, besides having to buy large tubs of ice cream and adding them to my blender with milk?
Do you also have a suggestion for making these healthier, if possible?

Over ten years ago I came up with this “milkshake” idea, mostly because here in Israel, the children are sent home from school between 1-2 pm, the hottest time of day. Couple that with the fact that they have to walk home most often, and are shlepping heavy backpacks on their backs and you get tired, hot, cranky and very thirsty kids coming in your house midday. Mine, especially, were in no mood for a heavy meal then and really appreciated something cold and refreshing.

I never use ice cream. It is expensive, doesn’t work that well for a thick shake, and adds a lot of sugar. I simply use frozen, ripe bananas.

When bananas are cheap, I buy a whole lot of them. I let them ripen to the point that they are delicious and soft, but not totally browned. Then I peel every one of them and freeze them in cheap bags, two at a time. If you freeze them in their peels, it is very difficult to get the peel off easily later on, which is why I freeze them unpeeled. Just one word of caution: bananas have all sorts of things clinging to their outside peels so watch your fingers as you peel them. Check them over briefly to make sure that your unpeeled bananas did not inadvertently become dirty in the process. After that, all I do is place them, bagged and tied, all in one of my freezer drawers, ready for use.

To make my shakes, I then put 2-3 frozen bananas in my blender and add 2 cups of milk. I let it sit for five minutes to soften the bananas somewhat, but not all the way. I cut through the chunks with a knife. If it cuts easily, it can then be blended. Cover the blender, turn it on high and poof—a creamy, delicious, and healthy shake is ready in seconds.

I even keep a steady stash of straws always on hand. Nothing like a tall glass of ‘milkshake’ with a straw to enjoy it with!

This also tends to be very filling and everyone, no matter their age, enjoys it. You can change the colors and tastes by adding in other pieces of softened, ripe fruit. Mangoes, strawberries, blueberries. You only need a small amount of the second fruit for flavor and color, the thickness comes from the bananas.

To make the shake thicker, add less milk per banana. To make it thinner, add more milk. You do not need to add any sugar at all nor any vanilla pudding powder to thicken this nor to flavor it. The sweetness of the ripened bananas is more than enough to make it sweet enough for all! And this milk version has the added plus of calcium.

I have a child who is allergic to milk. What else do you suggest?

You can certainly substitute almond milk, which is also very tasty. Or you can make it entirely from fruit juice and a bit of water. Add in the bananas and maybe 1/4 cup frozen blueberries. Pour 2 cups of orange juice and blend as above. It’s delicious.

I find this is a great way to enjoy a milkshake any time of day, no matter how many people are around and it really saves money too.

Enjoy your shakes!

Apple Beet Cake
Great idea just in time for Rosh Hashana!

Here’s a sweet, new idea on how to creatively incorporate some of our ‘regular’ Rosh Hashana foods in newer ways, beets, apples and a healthy sweet cake!

This freezes great and with all the beets, apples and whole wheat it is a healthier alternative to regular cake, especially for Kiddush in the morning.
Yields: 30 muffins or 60 mini muffins or 2 – 9 or 10 inch bund cakes

Ingredients

4 eggs
1 & 1/2 cups light brown sugar
3/4 cup canola oil
3/4 cup orange juice
3 cups whole wheat flour
1 & 1/2 teaspoons baking soda
2 teaspoons baking powder
4 small green apples, peeled and shredded
1 teaspoon cinnamon
2 teaspoons additional sugar, or take some sugar off of the amount above
1 teaspoon lemon juice *
2 cups shredded cooked beets
*We don’t usually use tart lemon juice at this time of year; those who want to can leave it out. It is only incorporated into this recipe to keep the apples from turning colors and its taste is not discernible in the final product.

Method

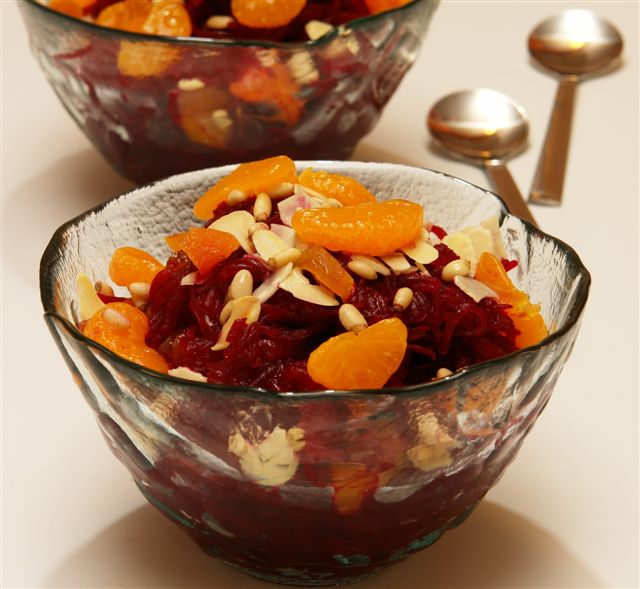
Before beginning, make sure you have already cooked beets on hand, either by boiling them earlier that day and cooling them in the fridge or by baking them, covered at 375°F / 190°C for 45 minutes. They will shred much neater and easier when the cooked beets are cold. Shred them, then measure out 2 cups and keep them ready. If you have extra, either turn them into beet salad or eat them for dinner!
Put all 4 eggs into the mixer, you don’t need to separate them first. Using your wire wisk, beat the eggs for 3 minutes to aerate them somewhat. Then add in the oil, orange juice, flour, baking soda and baking powder in the exact order listed, while the mixer is beating on a low speed. When the batter is smooth, turn off the mixer.

Toss the shredded apples with the cinnamon and the extra bit of sugar and lemon juice. Add them into the batter, together with the shredded beets. Using a spatula, gently turn and mix it into the batter until it is all incorporated. The batter should turn a deep pinkish color.

Preheat the oven to 350°F / 180° C.

Line your muffin trays with muffin liners. If you are doing the bund cake shapes, spray two 9-10 inch bund pans with baking oil spray. Pour batter into the bund pans only until halfway filled, not higher. If you are doing mini muffins, put 2 tablespoons of batter into each cup. For regular muffins, put batter into the cups until it is a little bit more than half way filled with batter.

Slide the cake or muffins into your oven and bake until done.

Bundt cakes should take between 25-30 minutes. Test it to ensure it is done and remove immediately so it will not overbake.

Mini muffins take only about 8-10 minutes to be fully baked.

Regular sized muffins should take between 14-18 minutes.

If you would like a sort of pomegranate or cranberry juice glaze on the top of your bund cake, here’s a nice glaze to try out. However, ONLY add on the glaze after your cake has cooled down completely, or else it will sink and disappear into the cake!

Pomegranate flavored glaze:

1 cup powdered sugar
2 tablespoons oil
2-4 tablespoons juice

You don’t need to buy expensive real pomegranate juice. I just used one of those Spring boxes of pomegranate ‘juice’ drink. It works fine.

Mix these ingredients together with a spoon, starting with only 2 tablespoons of the juice, until they are smooth. If it is too dry, add in bits more juice. If it is too thin and therefore sinks into the cake too quickly, add in more powdered sugar to thicken it. Once it’s a nice consistency, drizzle it with the help of a spoon all over your cooled cake, and enjoy!

Flax ‘n Fruit Milkshakes

The best way to prepare for these, is to keep a constant stock in your freezer of frozen bananas, strawberries, and other fresh fruit. When strawberries go on sales, I buy lots of them and then wash and freeze them. They keep for literally months this way, and then when I want to add a few to milkshakes or smoothies, I just reach into my freezer and take some out. Same goes for bananas. When they are very ripe, peel them, put them into individual bags, tie a knot on it and then leave them in a pile in the freezer. Then they are ready for use. If you freeze them with the peels on, it is difficult to remove the peels properly when they’re frozen and often turns out to be more work than it’s worth.

Ingredients

For about four hot and grumpy kids, place into your blender:

2-3 medium sized frozen bananas
6-8 frozen strawberries
1-2 tsp. GROUND flaxseed
3 cups of milk
Note: flax can only be digested when it’s ground. But it’s very hard to grind it in an ordinary food processor, so it’s best to buy it freshly ground or vacuum packed. Once you have it, make sure to store it in your freezer. It can go rancid very quickly in your cabinet. Flaxseed has important Omega-3’s in it and is very helpful to the digestive system as well. Just be careful not to overdo it; otherwise it can be bitter and be ‘too much’ of a good thing for the digestion!

Method

Layer in the bananas, then strawberries, ground flaxseed, then pour in the milk until the blender in 3/4 of the way full. Don’t fill it to the top because it will foam and rise and you don’t want it to leak out of the blender. Turn the blender on high, let the whole thing liquidize and serve. Thick, cool, refreshing, healthy and fun!