Expert challah tips and tricks. Join Challah Bytes today!

Tag Archives: desserts

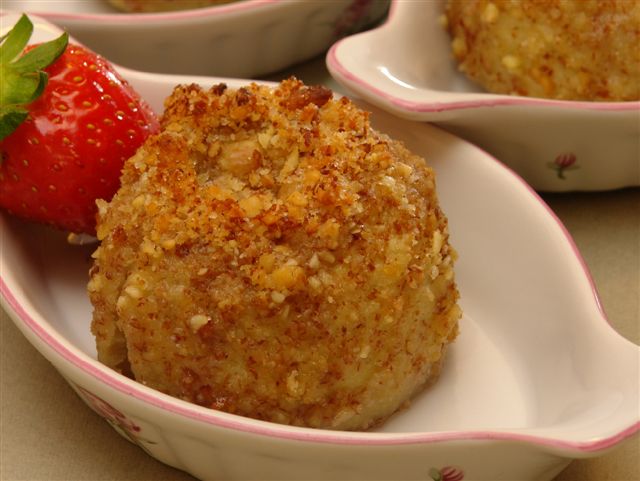
Cheesecake Petit Fours

Now here’s something sweet and small that is not your usual boring cookie cake.

Ingredients

1 container / 250 grams of soft white Tnuva 5% cheese
6 oz. of bisquitim cookies – you’d have to actually weigh them before you crush them
**once it is crushed, it comes out to 1 & 1/2 cups of crumbs, loosely packed
1/2 cup sugar
1 packet vanilla sugar
A few drops of any sweet white wine; a few drops is less than a half a capful

Method

Weigh the cookies first; then crush them into crumbs. Place the crumbs in a bowl.
Add all the rest of the ingredients and mix together by hand until completely incorporated.
Refrigerate for one hour.
The ‘dough’ should be firm enough to roll balls. If it seems too loose to you, add a bit more crumbs.

Form small balls from this cookie ‘dough’ and line them up on a tray to freeze until solid. Leave them in the freezer while you go on to the next step.

Topping/Dipping

You can now choose to dip and/ or roll the petit fours in a variety of different ways.

Chocolate
To dip them into melted chocolate, and here we will use a good quality MILCHIGS chocolate since they are milchigs anyways (!!) leave the tray in the freezer and only remove about 5 or so petit fours at a time for dipping.

Lay a sheet of fresh baking paper on another tray and then using a toothpick, dip the petit fours one at a time into the chocolate, let it drip off a bit, then gently release it onto the clean baking paper.
Keep doing this until you have dipped as many as you want to.

For a different effect, melt some white chocolate also. Or drizzle lines of opposite chocolate colors onto the petit fours.

Sprinkles
If you want to dip them into sprinkles, set up a small bowl nearby with colored or chocolate sprinkles and dip them in while still wet.

Other topping ideas

You can roll them, without chocolate, into:
Grated chocolate
Grated nuts
Cinnamon
Coconut
Crushed cookie crumbs

Or you can even leave them plain!

Enjoy!

Luscious Cheesecake

Serves 10-12
Ingredients

7 eggs, separated
1 ½ cups sugar
2 cups low fat cream cheese
OR 500 grams 5% Tnuva Gveena Levana soft white cheese
1-2 T. lemon juice
1 cup sour cream OR 1 container “Shamenet Tnuva”
3 T. potato starch **

Method

Preheat oven to 350°F / 180°C.

Whip the egg whites until they form soft peaks.
Add in 1 cup of the sugar and continue beating until it is a semi-stiff snow.

In another bowl, beat the egg yolks with the rest of the sugar until the mixture is thick.
Add the Tnuva white cheese, lemon juice, Tnuva sour cream/ Shamenet and potato starch and beat together until it is smooth.
Using a spatula, fold the whites into this mixture by hand.

Pour the batter out into a 9×13 pan OR a 10 inch round springform pan.
Bake for 50 minutes until the cake is firm and golden on top.
Turn off the oven but DO NOT remove the cake yet! Leave it to sit in the oven until the oven is cool.
Remove the cake carefully and let it finish cooling.

This slices and serves wonderfully as is. However if you want a topping on it…

Topping:

2 cups sour cream OR 2 containers Tnuva Shamenet
4 T. sugar

Mix this together and spread it over the cake.

For a nice splash of color, add fresh strawberries or blueberries on top of the cake.
Drizzle over some strawberry sauce and serve.

Freezes well.

Easy No-bake Cheesecakes

Ingredients

2 ½ cups / 500 grams soft white cream cheese (the Gveena l’vana 5% for Israel)
1 cup sour cream (for Israel, use one container Shamenet)
1 cup sugar
¼ cup powdered vanilla pudding ; this is about a half container of one of those boxes of powdered pudding mixes
1 small Rich’s whip
¼ cup cocoa
Plain cookies, ie, tea biscuits – some in plain vanilla, some in plain chocolate, to be able to make the contrasting colors
3 T. cocoa, reserved

Method

To make the ‘batter’, mix as follows:
Add together the soft cream cheese, sour cream, sugar, pudding powder and mix together well until it’s smooth.
In a separate bowl, whip up the whip and then fold that in as well.

Take out two disposable aluminum baking pans, something a tad smaller than a 9×13.
If you plan to make both colors on one day, you will need to double the cheese batter recipe, if you want to have two full 9×13 pans’ worth of each color.

Now simply layer the ‘cakes’.
Put down a thin layer of cheese on the bottom of the pan to keep the cookies from sliding around.
Layer on one layer of cookies, and then a thick layer of cheese mix.
Keep doing this until you end off with a top layer of cookies.

For the vanilla cheesecake, you can then melt 100 grams / about 4 oz. dark milchigs chocolate and using a spoon, just drizzle it all over on top of the cake.

Another topping idea:
Take some of the cheese mixture, and mix in by hand the cocoa listed above.
Then, after it is smooth, simply smear it all over the top of the cake.
It will turn into ‘frosting’!

Let the cake sit in the fridge, covered, overnight.
By the next day, the cheeses and cookies will have soaked into each other, thereby creating a real cheesecake texture. And best of all, no worrying about a milchigs oven!

Here’s a topping for the finished “cake” EVERYONE is sure to love – buy a packet of chocolate/white candies, like “Clicks” and put them on all over the cake or adding some to the top of each square as you cut them. Really fun and delicious!

Four Glaze Toppings for Chanukah Doughnuts

Here are easy and DIY recipes for glazing many flavors of doughnuts.

Chocolate glaze:

1 cup powdered sugar
2 tablespoons water
2 tablespoons cocoa
2 tablespoons oil

Mix in a bowl with a spoon until smooth. It should be the consistency of loose peanut butter. If it is too thin, add more powdered sugar. If it comes out too thick to spread add in a bit more water. Re mix and spread on your cooled down doughnuts!

White glaze:

Do all of the above but take out the cocoa; add in a teaspoon of vanilla extract instead

Lemon glaze:

Same as white glaze but instead of vanilla extract, add 2 teaspoons of lemon juice instead and decrease the water by the same amount

Coffee glaze:

1 cup powdered sugar
2 tablespoons water
2 tablespoons instant coffee dissolved in the water first
2 tablespoons oil

Mix the coffee and water together first to make sure it is dissolved. Then add the rest and stir to form a glaze

Other fun toppings:

When your doughnuts are wet with glaze, you can sprinkle on any kind of fun toppings such as:
Colored sprinkles
Chocolate sprinkles
Chocolate bits
White shredded coconut
Ground nuts
Or anything else you like
Enjoy!

Mini Honey Cake Muffins

We eat and also give honey cake out to friends in honor of Rosh Hashana, to symbolize our wish that they enjoy a sweet new year…I’ve been making these for years and they are always amazing…what a tasty way to say Shana Tova…

Makes about 45-50 or so mini muffins

Ingredients

3 eggs
1/2 cup oil
1 cup light brown sugar
3/4 cup honey
2 teaspoons baking powder
2 teaspoons baking soda
1 teaspoon vanilla
1 teaspoon cinnamon
3 cups flour (you can use 70% whole wheat flour too!)
1 cup warm water + 1 tablespoon instant coffee dissolved into it

Method

Place the eggs into the mixer, no need to separate them.
Beat them on high; add in the sugar; turn down the speed and add in the oil.
Using the same measuring cup as the oil, measure out the honey; the oil that was in the cup will make the honey slide right out of it.
Add in all the other ingredients in the order listed and then beat them together until they are smooth.
If batter gets stuck to the sides of the bowl, scrape it down and re-beat for one minute so there will not be any lumps of flour stuck in your batter.
Pour into lined muffin cups.

Preheat the oven to 350°F / 180°C. Bake the mini muffins for 10 minutes until the tops are golden brown.
Freezes well.

Crunchy Coated Baked Apples

50_crunchy_apple
image-2001

Yield: Each apple is one serving, but most people will want more than one serving of this one!

Ingredients

6–8 medium green apples, peeled
Oil as needed
1½ cup crushed walnuts or almonds, or a mix of both
¼ cup sugar
1 packet vanilla sugar
White raisins, optional

Method

Peel and core each apple.

Preheat the oven to 350°F / 180°C.

In a bowl, mix together the crushed nuts, sugar, and vanilla sugar.

Brush each apple gently with a bit of oil. Roll each apple into the nut mixture.

Line a small baking pan with parchment baking paper. Stand up the coated apples in the pan. When they are all ready, spoon a bit of the nut mixture into the center of each apple’s hole. You may choose to add several golden raisins to each apple’s center as well. Place the pan into the oven and bake for about 45–55 minutes, checking them after the first 45 minutes. They are done when they are soft.

Gluten-free Chocolate Sponge Cake

Serves 6–8, depending on how generous you want to be with the slices…

49_chocspnge
image-1998

Ingredients

8 eggs
1¼ cups sugar
5 T. cocoa
2½ – 3 & 1/2 T. potato starch

Method

Preheat the oven to 350°F / 180°C.

Prepare a large 10″ tube pan. Although most sponge cakes say not to grease the pan, I do grease it very lightly. Then dust it lightly with a bit of cocoa, shaking off the excess. Set aside.

Separate the eggs, putting the yolks into one bowl and the whites into another bowl. Beat the whites until they are nearly stiff. Then add in half the sugar while continuing to beat the whites. Turn off the beaters and set the whites aside.

Beat the yolks until they are thick. Add the remaining sugar, and beat them until they are creamy. Add in the cocoa and potato starch and beat just another minute or two until they are incorporated. Turn off the beaters.

Fold both mixtures together using a rubber spatula. While folding, if the batter seems too liquidy, you may add in a bit more potato starch. Pour this into the prepared tube pan.

Bake for 50–75 minutes, checking to make sure it does not burn. When the cake is done, remove it from the oven and place on a wire rack. Leave it for 15 minutes.

Now there are two options of how to release the cake, whole, from the pan.

After the first 15 minutes, turn the cake upside down by balancing it onto several flipped over cups and allowing it to cool while in this upside down position. My mother always does it this way and it usually works. Then, when it’s completely cooled, you release the cake from the pan with a sharp knife and gently take it out of the pan.

The second way, which is how I usually do it, is: prepare a large piece of foil, lined with one or two paper towels on it. After the cake has cooled for 15 minutes, slide a long, sharp knife around its edges, as well as around the innermost edges. Carefully flip the cake pan over onto the prepared foil. Remove the pan. Leave the cake to sit until it has cooled more, then wrap it up gently and freeze until the day of use.

To create the delicious glaze you see featured here which I also use when making brownies:

1 cup powdered sugar
2 T. oil
2 T. cocoa
2 T. very hot water

Mix this all together in a small bowl by hand with a spoon. If it’s too thin and runny, add a bit more powdered sugar to it. If it’s too thick, add drips off water to it until it is still thick but can be spread. Allow it to drip and run all over the top of the cake, downwards, into its crevices and dents. You can then top it off with chocolate curls, just like in the photo. The cake itself can be frozen; I then add the topping to it directly before I want to serve it.

Great Presentational Effect on Your Crowd!

I’ve been baking and serving these for all kinds of simchos for more than two decades and they have always been a hit. Now you can try them for yourself…

Mint Chocolate Brownies

Each recipe makes one 9×13 tray

Brownie Layer

Ingredients

4 eggs
2 cups sugar
1 & 1/2 cups flour
3/4 cup cocoa
3/4 cup oil
2 teaspoons vanilla
1 teaspoon baking powder

Method

Preheat the oven to 350°F / 180°C.
Beat all the ingredients together. It should be a thick batter. Line your baking tray with baking parchment paper. Pour the batter out into the center of the tray. Hold onto the paper while you smooth the batter into all corners of the tray. Slide the tray into your hot oven and bake it for 20-22 minutes, until the center tests clean. Do NOT overbake or your brownies will burn and become too hard and dry. Remove them from the oven immediately and allow them to cool. Freeze slightly.

Mint Layer

Ingredients

1/2 cup margarine
2 cups powdered sugar
1 tablespoon water or non dairy creamer
1/2 teaspoon mint extract

Method

Beat the mint layer ingredients together on high until it is creamy and fluffy. Using a flat spatula, spread this all over the top of the frozen or slightly frozen brownies. Place these into the freezer to set while you prepare the top layer.

Top Layer

Ingredients

200 grams (about 7-8 oz.) pareve chocolate
3 tablespoons oil

Method

Melt the chocolate in a double boiler or in a microwave. Add the oil and stir together. Immediately spread this all over the top of the mint layer. Allow it to cool off and harden. Cut into squares after it has cooled off and serve.
This freezes great; however, to slice them, do so when it is not frozen. Frozen chocolate layers tend to crack instead of slicing nicely.

Enjoy your simcha!

Crunchy Pumpkin Pie

This is the only part of the recipe that has margarine; but since it’s not a major part of the pie and it’s really only to hold it together, I kept it in. You can either use the recipe for pie crust that I’m going to write here, or one frozen pie crust.

Pie crust

Ingredients

3 cups flour, white or finely ground whole wheat
1 cup margarine
1 cup cold water
2 tablesoons sugar
A small dash of salt

Method

Crumble flour and margarine together until crumbly. Add all else and knead with a fork and/or your hands until it is a dough. Place in fridge in a plastic bag for an hour or more before use.

Pat this into the bottom of a 9-10 inch pie pan, being sure to build it up the sides as well. You may bake it for 10 minutes before filling it, or just fill it unbaked. I chose to bake it first.

Filling

Ingredients

1 can of pumpkin OR 2 & 1/4 cups fresh, drained well
3 eggs
1 cup white OR light brown sugar
½ cup dark brown sugar
1/3 cup canola oil
1 tsp vanilla
1/2 cup whole wheat flour – BUT, if you are using the canned pumpkin, this is not necessary

Method

Mix this together by hand and pour it into the crust.

Another variation of this is to use a mix of the canned pumpkin and also the fresh, half/half…it just makes the texture a bit thicker.

Topping

Ingredients

1/3 cup flour, any kind
3-4 Tbls dark brown sugar
1 Tbls minced crystallized ginger, optional
1 tsp cinnamon
1/4 tsp nutmeg
2 tablespoons oil
1/3 cup walnuts, coarsely chopped – optional

There is a minhag to refrain from using nuts from Rosh HaShanah until after Succos; I am only including the nuts in this recipe for when you want to make this again, as I’m sure you will, at other times of the year.

Method

Toss these ingredients together with a fork in a small bowl until it resembles crumbs. If it is too dry, add a bit more oil until it is crumbly enough. Sprinkle all over the top of the pie and bake at 350° F (180°C) for about 45-55 minutes, until it is firm and golden on top.

These come out really sweet as a mini pie as well.

Sweet Zucchini Bread

This recipe makes two standard loaf pans’ worth, or three small ones. It’s blessing is mezonos, even though it is called a ‘bread’. It’s really more like a cake consistency.
This “bread” has no yeast and is more the consistency of cake.

Ingredients

3 eggs
2 tsp. vanilla extract
1 cup canola oil
1¾ cup white or light brown sugar
1 (8 oz.) can crushed pineapple, drained
2 cups shredded zucchini, washed and unpeeled
2 tsp. baking soda
¼ tsp. baking powder
¾ tsp. salt
1–2 tsp. cinnamon
3 cups flour
1 cup golden raisins
1 cup coarsely chopped walnuts

Method

Beat eggs, vanilla, oil, and sugar together until thick. Add in the pineapple, zucchini, baking soda, baking powder, salt, and cinnamon. Then add in the flour, and on top of that, the raisins and walnuts.

Tip for side of page:
It’s always best to add the raisins on top of the flour as once the raisins are coated with flour, they will not sink down to the bottom of whatever cake or muffin they are in, where they may burn.

Mix until this just until it is completely blended together and resembles a thick batter.

Pour into loaf pans that have been lined with parchment baking paper and bake at 350°F / 180°C for 45 minutes to an hour. They are done when a cake tester or knife inserted into the middle comes out clean and only very slightly sticky. These loaves stay moist and slightly sticky inside. Slice and serve, or freeze for later use.