Expert challah tips and tricks. Join Challah Bytes today!

Tag Archives: challah

I have a special treat for you: a sprouted wheat challah recipe from one of our readers, Chava Dumas!

Here it is, in Chava’s own words:

These humble healthy challahs look so heimish to appear alongside Tamar’s elegant professional looking challahs, but indeed they have an incredible taste from the sprouted wheat kernels.

When I first started making them, my kids said, “Wow, Imma what did you put in these challahs?” And you know, coming from kids (teenagers!) this is a BIG TIME compliment!

Sprouted wheat– Challah made from the flour of ground sprouted wheat has the extra benefits of greatly increased nutritional value, plus the germination of starch into easier to digest natural sugars. An amazing special flavor!

Challah topping– Decorated with a combination of different colored seed toppings, these challahs can remind us of the manna we received for forty years in the wilderness after we were liberated from Egypt.

This is our “Dumas family” recipe!

Sprouted Whole Wheat Challah

Ingredients

4 cups warm water (or more)
2 tablespoons dry yeast
¼ cup honey
1 tablespoon sea salt
12 cups (~1.5 kilo) sprouted whole wheat flour (or sprouted spelt flour)

Directions

Combine warm water, honey and yeast.
Add flour, one cup at a time until dough is soft and springy. Begin to knead until dough does not stick to your fingers, about 5 to 10 minutes.
Place dough in a large bowl, cover with a cloth. Let it rise for about 1 or 2 hours, until doubled.
Punch down, knead again.
Divide into balls to roll into ropes for braiding.
Place in oiled bread pans (or use baking paper). Let rise for about 45 minutes.
Brush with whisked egg. Sprinkle with a variety of toppings: white and black sesame seeds, flax, sunflower, pumpkin, or chopped almonds.
Bake in a pre-heated over 350 F. (175 C) for about 30 minutes.

This recipe makes approximately four loaves the size of what you see in the photo below.

sprouted wheat 2

Chava Dumas is an educator, certified doula, women’s health advocate and cancer support counselor. Read more special tips in her life-changing book Prepare for Pesach B’simchah! 40 Lifesaving Lessons to Help you Make it to the Finish Line a book that helps everyone celebrate the gift of life every day!

My challah crumbles when we cut it. I don’t know why. This is what I do. I never had any issues with it till now but I changed a few things. I started to use distilled water and self rising flour, maybe one of these is the problem. Not sure. But the challah is so sticky that I add a little more flour. I tried adding oil but it still is sticky so I can’t roll it very well. What should I do?

Tamar’s answer:

It’s hard for me to “diagnose” a challah problem without knowing the entire recipe you are following. However… in absence of knowing exactly what else was in your recipe, I’ll take an educated guess.

Rising agents

You should NOT use “self rising flour” for any challah recipe. The reason those flours “self rise” is because they are laced with tons of either baking soda, baking powder or both. Baking powders are one kind of a rising agent, and yeast is a totally different one.

Self-rising flour is meant for simple cakes where people don’t add baking powder to the recipe and instead use this flour. I bake tons and tons all the time and all I can say is that I have never once in my life ever used such flour. I’m nearly certain that is the problem.

If the flour has all that baking powder in it and then on top of that you have the yeast of the challah recipe, the challah is sure to dry out while it is baking. It can’t be a cake and also a bread at the same time .

Let’s bake it again

Try using ordinary flour that you sift first before starting to make it into a dough. Follow the instructions for any of the recipes in A Taste of Challah. I’m pretty sure your challahs will then come out as you are expecting them to – soft and delicious!

IF, for some reason , this does not solve your problem, please write me again and we’ll try once more to help you! Either way I’d love to know if my answers help you.

Happy baking!

One of the most frequent questions I receive is about freezing challah dough.

Can I freeze challah dough?
How do I freeze challah dough?

People all over the world freeze their challah dough.

However, I have found that the dough does not bake the same way once it has been frozen as dough, so I prefer not to freeze unbaked challahs.

Here is what I do instead.

1 I bake the whole batch.
2 Then freeze them baked.

Fresh challah, no mess

If my challahs are all baked and lined up in the freezer already, all I have to do on a week when I don’t have time to bake, is to remove the challahs from the freezer a few hours before Shabbos and poof – fresh challah, no mess.

Warming up the (formerly) frozen challah

If you want the defrosted challahs to be warm:

1 Wrap them in foil.
2 Warm up your oven shortly before Shabbos
3 Turn off the oven and then place the wrapped challahs in your warmed up oven shortly before Shabbos begins.
4 Remove them before Kiddush and place them on the table.

If you really want to freeze the unbaked dough

I know lots and lots of my readers enjoy having the smell of the freshly baked loaf in their homes and for this reason they do want to freeze unbaked challahs. And sometimes people only own small freezers and therefore do not have room to store risen and larger challahs – the frozen ones are smaller in size…

SO
If you do choose to freeze the unbaked challahs here’s what I’d do:

1 Make the dough
2 Do the hafrasha
3 Let the dough rise the first time for about an hour or so
4 Punch down and then shape.
Note: No need to let the shaped challahs rise if you are about to freeze them.

Freezing unbaked challahs

1 Line the baking tray with baking paper and place the shaped challahs upon them.
2 Freeze them uncovered.
3 When they are frozen solid, place them in good quality freezer bags and leave them in the freezer.

Prepping frozen dough for baking

The day you want to bake the frozen, shaped challah dough:

1 Take the frozen challah dough out of the bags.
2 Place them on the tray or in the pan you want to bake them in.
3 Let them sit there to defrost and then (hopefully) to rise.
4 When risen, brush with beaten eggs and bake as usual.

Happy baking!

Explaining Shlissel Challahs

This article first appeared in Hamodia’s Inyan Magazine, 2014

Question:
I know that the first Shabbos immediately following Pesach is what is known as Key Challah week, aka, shlissel challahs. What is this minhag all about? Doesn’t Hashem decree what we will make for the whole year on Rosh Hashana?

Question:
I tried making key challahs so many different ways but they come out looking anything but like a key. Any ideas you can share?

Answer to both qu’s:
The minhag to bake shlissel challah for the first Shabbos after Pesach is a long-standing one. To quote the Sefer HaTodah by R’Eliyahu Kitov: “The Shabbat after Pesach when we announce the coming of Iyar some…have the custom to make challah in the form of a key and to sprinkle it with sesame seeds. This is to remind us of the Mahn that fell in the desert and began falling in the month of Iyar; it also symbolizes that the ‘key’ to our parnossa is in Hashem’s hands. We pray that Hashem will open up his store of treasures and shower us with abundance.”

Sesame seeds are used to depict mahn as they are small and white as it says about the mahn, “they were like small seeds, white, and [tasted] as if they were dipped in honey.”

As for what is decreed on Rosh Hashana…a Yid always can use more bracha. We all want to pray that our parnossa comes through an easy and normal way, with no undue stress and hardship, so the extra tefillohs and brachos can only help.

I also interviewed Rebbetzin Sara Meisels (of Bobov) about this minhag and she had an additional background story to tell me about it:

There’s a beautiful story about the Maharal M’Prague that happened during the time that Klal Yisroel were persecuted relentlessly by non Jews with blood libels, r’l. After Lail Haseder, the Maharal was sitting and learning in his room at home; the key to the shul was with him, hung up in its place on the wall. The key suddenly fell to the ground. He picked it up and put it back on the hook. After it was hung up, it fell again. He picked it up once more. And then it fell a third time. This time he realized that Shomayaim was trying to tell him something, so he went to check the shul. When he got there, he saw that the paroches was moved out of place. He opened the Aron Kodesh and saw, hidden inside the Aron, what looked like a bottle of wine. After opening it he realized it was a bottle of blood; the non Jews were trying to set up a blood libel against them! Quickly, he pulled out the bottle, poured out the blood and rinsed it. He then poured wine inside instead.

The next morning the goyim burst into shul with the police, yelling and screaming. They went straight to the Aron Kodesh – obviously they knew where to go – and pulled out the bottle. The kehilla was very frightened but the Maharal was calm as he watched what happened next…the police opened it up and smelled it and it was only wine! They got very angry at the perpetrators and threw them in jail. Miraculously, the entire kehillah was saved. It was a huge hatzalah for the whole Jewish community.

Afterwards the Maharal wanted to do something to commemorate this special miracle. He knew that everyone bakes challah right after Pesach – especially in those years they had no other food besides the bread they made themselves – so he told his Rebbetzin to bake the challahs for that week, in the shape of a key. Afterwards, it became part of Klal Yisroel and their Kehilla for every generation. We also know that these ‘key challahs” symbolize the key to parnossa, as the Sefer Hatodah mentions.

So since nearly all of us want blessing for a good parnossa, we usually find a way to push ourselves to get those challahs done somehow, even after all the work of Pesach has just finished. I know of someone who would make extras and give it out to some of her neighbors to wish them a blessed year filled with parnossa tova…

There’s lots of interesting ways to make a key challah. I already have shown one in my Hebrew challah book and in a previous article I did for Hamodia over seven years ago; this time I’d like to try a new way. I saw this done by a lady named Sara E. who hired me to do a challah show for her whole family on Chanukah. In fact, you can even combine this with another minhag of having a challah that is made out of 12 pieces, a yud beis challah…

Take 12 smaller pieces of dough. Roll each one up into a small roll, whichever shape suits you. I liked the idea of them being small round flower-like shapes. You roll out the challah strand, and holding one end you make a small circle; the long end of the strand that you have left over, weave in and out of the hole of the circle three times, ending on the bottom of the roll. When these bake they will resemble a closed flower. Line up five of them in one row, with one or two rolls connected to the side of the second to bottom roll in this row.
This will become the bottom of the ‘key’.

The top part is very simple. Continuing where the top roll of the handle is, place the rest of the little rolls in a circle coming off of it. This is the top of your ‘key’. Now take a piece of baking paper that you squish into a ball shape OR a round small cookie cutter (and grease it with oil first so it wont get stuck inside the challah) OR use a piece of foil. Place this in the center of the circle so it will stay open.

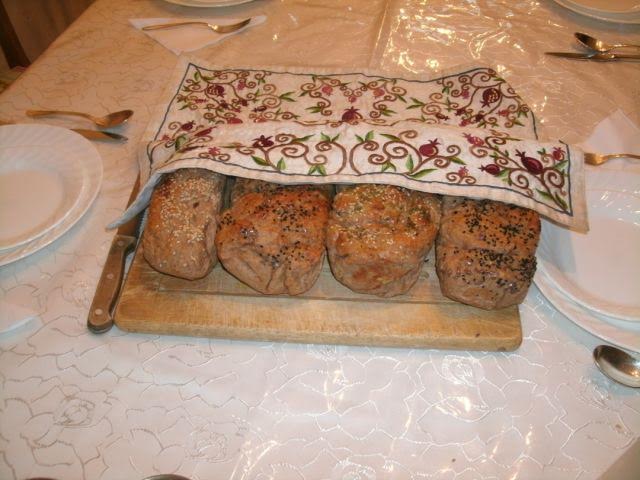
Let it rise for 15-20 minutes and not longer. Too long and it will lose its shape. Preheat the oven; while it is heating, brush your challah with a beaten egg. If you make more than one challah, even better! Then sprinkle them with white sesame seeds and bake them at 375°F / 190°C. It should take about 20-25 minutes to brown to perfection on both the top of the challahs as well as the bottom.

When it is done, remove it carefully to a wire rack to cool, being careful that it should not break apart. Freeze it on a flat, lined cookie tray until hardened and them wrap it in plastic until the day of use. Or just shape it that Friday morning and then bring it directly to the table to await Hamotzi that night.

Just break off the rolls and serve. If you have more than 12 people at the table, I guess you will have to cut them up a bit more!
With warmest wishes for parnossa tova u’veshefa,
Tamar Ansh

Onion-Filled Hamantaschen Challah

First, prepare a good challah dough. If you need a recipe, check www.aTasteofChallah.com where I’ve posted many challah recipes, as well as my “Incredible Challah Dough Recipe” card that can be downloaded free from the site as well!

Ingredients

Challah dough
1/4 cup oil for smearing
1 egg for glazing
2 onions, sliced and sautéed
3-4 tablespoons oil
1 teaspoon salt
1/8 teaspoon pepper
1/2 cup challah bread crumbs
2 tablespoons poppy seeds

Method

Filling: Slice 2 onions into half rings. Sauté some onions. Add a bit of salt and pepper to taste, plus several tablespoons of challah breadcrumbs.

Assembly:

Cut challah dough into sections that are between 6-7 tablespoons in size. Shape each piece gently into a ball.
Roll out each ball so that it resembles a flat circle.
Place a spoonful of the onion breadcrumb mix into the center of each flattened piece. Sprinkle some poppy seeds if desired.
Pick up the first side of the flattened circle and pinch it together; do the same on the second and third side.
Place the filled challah face down on the lined cookie sheets. This keeps their Hamantaschen-shape and prevents the challahs from opening up as they rise and bake.
Preheat the oven to 350° F/180° C.
Let the challahs rise for 20 minutes. Brush each challah with a beaten egg.
Bake for 15-20 minutes or lightly browned.

Crunchy Challah Bottoms

Line your baking tray with parchment baking paper. To keep it from moving around, spray your tray lightly with a bit of water first and only then put on the paper. It will stay put that way without making your tray oily.

Sprinkle a wide line of sesame seeds directly onto one side of your tray. After you’ve finished braiding your challah, place it down directly onto the seeds and roll is slightly back and forth on them so the seeds will stick to the bottom of your challah. Then place the challah onto the tray to bake. Do this to both challahs (I’m assuming you are doing two challahs, or three at most per tray) and then cover them to rise as usual. Egg them and bake as directed. Enjoy your crunchy bottoms!

Yeast to Flour Ratio

I have read all your info on yeast, but am still confused!! – I have just bought individual 11g sachets of Instant Dry Yeast (manufacturer Dagan) – how do I use it in my challas????- I look forward to your reply – many thanks,

An 11 gram packet is about 2 teaspoons plus a bit more of yeast. This is not so exact so, since I never buy such small packets, I would suggest measuring it with a teaspoon. See how much it comes out to be. If you only want to do a small amount of challah, then cut down the recipe I gave you to half and this way you will only need one and a half of such packets for about 8-9 cups of flour ratio.

Happy challah baking!

Sweet Challah Toppings

Sweet crumble topping

100 grams marg
1/2 cup white sugar
1 cup flour
1 tsp. cinnamon

Crumble it together until it’s, well, crumbs. If too mushy, add more sugar another 2 Tablespoons and a bit more flour.
Recrumble. If it is too dry, add a bit more margarine.

I try not to use margarine so I often substitute oil in these things. It works pretty well. For a once a year crumble, though, I probably would yes use the margarine this once.

Let the challahs rise, covered loosely with a plastic bag over its top for 30 minutes. Then wash with egg wash (one beaten egg in a cup) sprinkle on your crumbs and bake for 25-35 minutes until done.

Cinnamon sugar topping

Sprinkle the top of the challahs, after they are brushed with egg wash, with a cinnamon/sugar mix. This is really delicious!

A Word About Types of Whole Wheat Flour

There are several types on the market, both in Israel as well as abroad.

There is regular, stone ground whole wheat flour which is tasty and healthy, but a much heavier, bran-ny kind of consistency.

Then there is something called very finely ground whole wheat flour. It is so fine that it works and even closely resembles white flour. I have found that it can almost universally be substituted for white flour. It is not bleached, it is whole wheat, and it works amazingly well even without mixing it together with white flour.

The difference between this kind of whole wheat and the more stone ground version is that it is fine and also that is has some of the bran taken out of it so that it is not as heavy as the regular whole wheat flour.

When I say “finely ground” I mean this super ground flour, when I say “regular whole wheat”, I am referring to the heavier whole wheat

Hello again! I was about to begin baking my challah using whole wheat flour and without eggs.
Your recipe says to put the ingredients into a mixer bowl and knead for ten minutes with a mixer. Do you mean a hand held mixer like I use for cakes? Or only the heavy duty bread machine type of mixer?
Or another way to ask my question: can I knead by hand for ten minutes?

I’ve been making challos and bread for many decades but every batch comes out different… so I wanted to try to have these be “perfect!”

Whole wheat flour absorbs more liquid than white. And especially if you are taking out the eggs you will then need to add another 1/2 cup of water to the recipe and a bit more oil.

Of course I do NOT mean a small hand held mixer, it would break in a sec. Yes a big machine mixer. But for sure you can knead it by hand, in fact its even preferable because you can knead and pray at the same time…