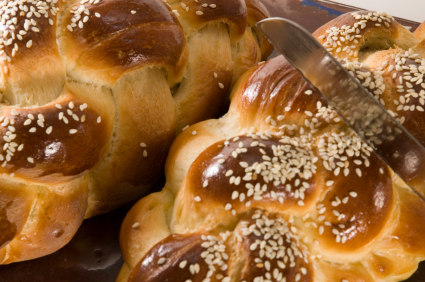
Sweet Mixed Whole Wheat Egg Challah
Ingredients
This larger amount makes enough dough to get the mitzvah of hafrashas challah, ie, separating challah with a blessing. It makes 6 larger challahs, 8-9 medium sized ones.
10 cups / 1.5 kilo very finely ground whole wheat flour (or one of the whole wheat flours that are 75%-85%) 12 cups white flour, sifted 5-6 cups warm water 3 eggs 1 T. salt 2 & 1/4 cups light brown sugar 1 cup canola oil 100 grams fresh yeast cube or 3 & ½ Tablespoons dry yeast Additional eggs for glazing Seeds of choice A bit more oil for shaping and rolling For those of you who want a very small recipe, here are smaller amounts: Just remember, that when doing this small version, you cannot get the mitzvah of ‘hafrashas challah’ as the amounts of flour are too small… 10 cups / 1.5 kilo very finely ground whole wheat flour (or one of the whole wheat flours that are 75%-85%) 2 and 1/2 cups finely ground whole wheat flour 5 cups white flour 2 cups warm water 1/2 cup additional warm water if needed 1/3 cup oil 1 egg 1 teaspoon of salt 3/4 cup light brown sugar 1 Tablespoon dry yeast Additional eggs for glazing later on Seeds of choice A bit more oil for shaping and rolling.
Method
Place the fresh yeast in the bottom of a large mixing bowl; crumble slightly with your hands. If you are using the dry, just put it in the bowl. Pour 1/4 cup of the sugar on top of it. Add part of the warm water to cover it, then cover the bowl and let the yeast proof for 5 -8 minutes. (If you used dry yeast, you do not need to wait for it to proof; just continue.)
Add half of the flour, the oil, sugar and eggs.
Start to mix while adding in some more of the water. Add in the salt and continue to knead. It should resemble a thick batter at this point.
Turn off the mixer and cover the bowl again. Let the mixture rest for 10 minutes.
Turn the mixer back on and slowly add the remaining flour while mixing and adding in water at the same time until a smooth, slightly sticky dough is formed. This can be done by hand as well as by mixer. Keep mixing until the dough is uniformly mixed. Add small amounts of water and oil as needed in order to complete the texture of the dough.
When done, transfer the dough to a very large, oiled bowl to rise. Turn the dough over once or twice so it becomes coated a bit with oil. Then cover the dough by sliding the entire bowl with the dough into a large plastic garbage bag.
Remove challah with a blessing, if you made the larger amount.
Leave the dough to rise now for an hour. Punch the dough down and leave it to rise another hour, if you have the time for it. This extra punching down and then re-rising activates the gluten in the dough and will make a marked difference in the final product.
If the shaping will be done only much later on in the day or the next morning, grease your hands with oil, punch down the dough all over and place it in a large garbage bag. Remove all air and seal it on top with a strong knot. Place it in the fridge until ready for shaping.
When you want to shape it, take it out of the fridge for at least an hour prior so that it warms up to room temperature first.
In the meantime, preheat the oven to 350 – 360 °F/ 185°C.
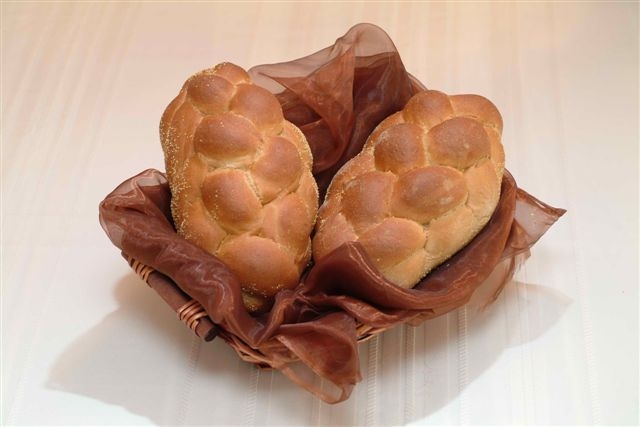
Line your trays with baking parchment paper, and shape dough into rounded shapes as desired. After the challahs have been shaped, allow them to rise for 40 minutes, covered lightly with plastic wrap so they won’t dry out.
Brush them with an egg glaze and slide them into the preheated oven.
At this point, the total rising time should be 45 minutes. Many times people write or say to let “breads” rise for an hour. However, with these pretty shapes, I find that just this amount of time works best. If you over-rise your challahs, they become too airy and then often fall, or spread out too much or lose their pretty shape and flatten when baking. To retain their beautiful shape, it’s best to bake them after they have risen between 40-45 minutes.
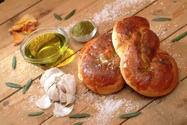
The custom is to shape the challahs in a rounded shape at this time of year, to symbolize that the Jewish Year never ends; it comes full circle and then we start again. And it also reminds us that we pray to Hashem for our lives to continue… just like a circle continues.